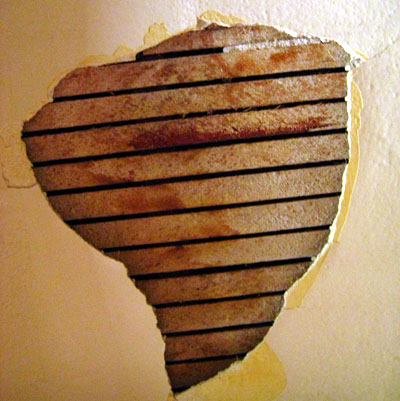
There are things that come part and parcel with living in an old house. There’s cool stuff like learning during a routine repair job yesterday that the locks on the bedroom door are 118 years old. And not so cool stuff, like a few months ago when I was getting a closer look at the extent of the cracked ceiling plaster in the living room and a chunk not the size of South America but certainly resembling the continent’s shape came down all over me, revealing the lathe it had become detached from however long ago. Lovely, isn’t it?

In the time since I’ve effected various cover ups, but when the last hastily taped pillow case came down awhile ago, we gave up trying to mask it and just let the hole be the hole until I decided to do something cheap and easy. Because I’m nothing if not cheap and easy.
As unlikely as it might seem there was some method to my madness. I knew the material I’d be using for the patch better be light, primarily because there was a certain precarious element to the remaining plaster as it was essentially separating from the lathe as well. So unless I wanted the rest of the panel to come crashing down, mounting anything like plywood or drywall to it wasn’t an option. Besides, the only way to attach anything would be to go straight through the plaster, which would crack it and let gravity do the rest.
No, what I needed was something lightweight that could fit up in there and could then in turn act as something of a brace by providing some resistance against the competing sections of plaster in hopes of stalling an furthing slippage.
The answer was cardboard and so I dove into our basement stash and came up with the biggest box we had and a can of spackle. Next I needed to transfer the outline of the hole onto the cardboard. At first I was thinking of chalking around the edge and just laying the box against it in hopes the chalk would transfer, but in the end what I did was securely tape a large piece of gift-wrapping paper over the hole and then using an X-acto knife carefully cut through the paper while moving the blade along the perimeter. That ultimately produced a template that I could then lay atop the cardboard and cut around.
The cardboard piece went in there imperfectly flexing inwards a bit rather than remaining flush, but then I wasn’t looking for perfect. All I was looking for was a solution that was easy to install and conversely would be easy to pull down when the time came to repair it right. So after roughly spackling it into place and sanding the spackle down after it dried I mistakenly applied a coat of magnolia white thinking that was the ceiling color. It wasn’t. Not only that the paint was semi-gloss so it glistened something fierce.
Thankfully Susan found the remaining ceiling paint she had down in the basement and after a coat of primer to cover up the gloss I applied it this morning. Here’s the before and after (click to triplify):
Like I said my main goal was to do something whose after didn’t look worse or was more noticeable than the before and I’m proud to say I accomplished that.
A small Flickr photo set of the D-I-Y progression is here.


 Follow